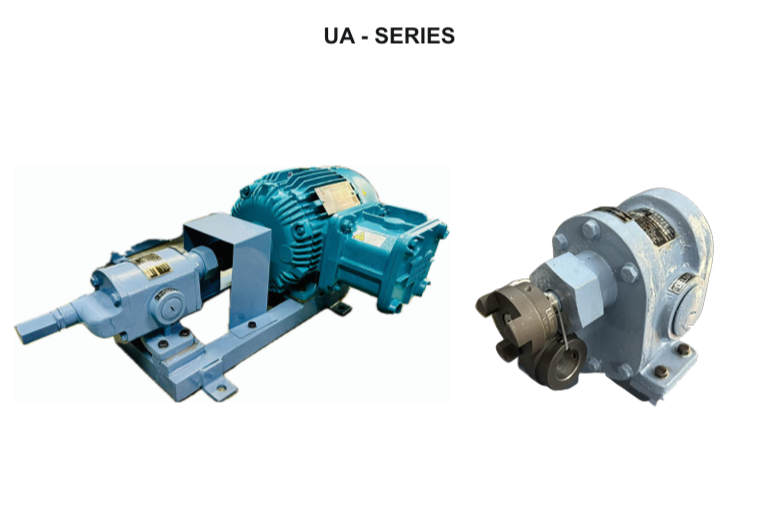
Installing and operating a Unique Rotary Gear
Pump requires attention to
detail to ensure
optimal performance, long service life, and reliable output. This comprehensive guide
outlines step-by-step instructions for checking, installing, aligning, operating, and
maintaining your Gear Pump system.
Initial Equipment Inspection
Upon receiving the shipment
- Verify the equipment against the delivery manifest.
- Inspect all parts for any damage or shortage.
- Report discrepancies immediately to Unique Pump System.
- Ensure these instructions are passed on to the installation and maintenance
teams.
Installation Location Guidelines
- Install the pump in a clean, dry, and well-lit area.
- Ensure the pump is easily accessible for maintenance.
- Avoid damp locations for motor-driven units unless proper protection is
provided.
- Keep suction piping short, direct, and of full diameter.
Foundation Setup
- Use a solid concrete base for vibration-free and rigid support.
- Include space for grouting beneath the baseplate.
- When installing on steel structures, place the pump directly over beams to avoid
distortion.
- Follow mounting drawings carefully for correct bolt positioning.
Factory Alignment
- All Unique Pumps are factory-aligned using surface plates.
- Shims may be used under feet for precise leveling.
Field Alignment
- Position the pump and motor on wedges near bolt holes.
- Use a spirit level to align machined pads on the base.
- Align coupling halves with a straight edge or by rotating the coupling and
checking
at quarter turns.
Important : Recheck alignment after piping installation. Misaligned piping
can
distort the
pump, leading to hot bearings, noise, and reduced performance.
Grouting
Upon receiving the shipment
- Grout the baseplate before connecting piping.
- Recommended mix: 1 part cement + 2 parts sand, add water until the mix flows
freely.
- Ensure complete support underneath the baseplate.
Suction Piping Guidelines
- Suction line should be of equal or larger diameter than the pump’s suction
port.
- Maintain a uniform upward slope from the fluid source to the pump.
- For high viscosity liquids, use oversized suction lines to reduce friction.
- Ensure airtight sealing to avoid capacity loss.
- Install a strainer with 3-4x the area of the suction pipe to prevent foreign
particles.
- Discharge should rise vertically (approx. 5x pipe diameter) to prevent
airlock.
- Always use a relief valve set slightly above max discharge pressure (no more
than +10%).
Stuffing Box and Seals
- Pumps usually come with neoprene oil seals.
- If gland packing is provided, avoid over-tightening. Minimal leakage assists
lubrication.
Priming Before Startup
- Never run the pump dry. Always prime with liquid before starting.
- If internal oil is present from testing, clean and refill with process fluid
if needed.
Direction of Rotation
- Follow the arrow marked on the pump.
- For reverse operation, rotate the back cover 180°, reposition bolts and grub
screw accordingly.
Starting the Pump
- Prime the pump fully.
- Check all electrical connections and control circuits.
- Confirm suction and discharge pressures are within specifications.
- Start under low load and gradually increase to full operation.
- Lubricate bearings periodically if external grease fittings are present.
Routine Maintenance Checklist
Periodic Checks :
- Confirm pump-motor alignment.
- Inspect for suction air leaks or clogged strainers.
- Adjust relief valve if pressure drop occurs.
- Check and tighten end cover bolts if leakage is noticed.
Annual Inspection :
- Replace worn gears, wear plates, or seals.
- Inspect and replace oil seals, bearings, or the entire body if needed.
- Ensure proper lubrication and part alignment.
Troubleshooting Tips
- If pump jams, loosen bolts slightly and use a pipe wrench to rotate the shaft.
- Allow overheated pumps to cool before restarting.
- Never dismantle without first consulting Unique Pump System.
- Use caution during commissioning—tight shafts may still be normal due to tight
tolerance.
Rebuilding Pumps with Bush Bearings
- Remove side covers and rotors.
- Check bush face wear; replace or machine if required.
- Maintain equal bush widths and appropriate packing.
- Inspect and eliminate burrs on body and rotors.
- Reassemble and ensure free shaft rotation with pipe wrench.
- Replace seals and check tightness.
Rebuilding Pumps with Antifriction Bearings
- Unbolt covers and use jacking holes if needed.
- Remove rotors, bearings, and wear plates.
- Inspect wear plates and gear faces; regrind or replace if necessary.
- Remove burrs and reassemble components precisely.
- Re-check free shaft rotation, replace seals, and tighten all bolts evenly.
Recommended Spare Parts List - Unique Rotary Gear Pump
| Sr. No. |
Standard Parts |
Quantity |
| 1 |
Neoprene Oil Seals |
2 No. |
| 2 |
Relief Valve Spring |
1 No. |
| 3 |
Packing Set |
1 Set |
| 4 |
Rubber Spider (Coupling) |
1 No. |
| Sr. No. |
Maintenance Parts |
Quantity |
| 1 |
Bush Bearings |
1 Set |
| 2 |
Ball Bearings |
1 Set |
| 3 |
Wear Plates |
1 Set |
| 4 |
Gear Set with Shaft |
1 Set |
| 5 |
Mechanical Seal (if applicable) |
1 No |
Important : When requesting spares, provide:
Pump serial number and nameplate details
Purchase order number and date
Conclusion
Proper handling of your Unique Rotary Gear
Pump ensures
long-lasting performance,
minimal downtime, and operational efficiency. Following this guide during
installation, operation, and maintenance will reduce the chances of equipment
failure and maximize productivity.